How to Post a Member Payment
Locating the Member
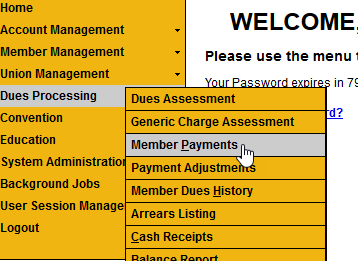
- Go to the Dues Processing Menu.
- Click Member Payments.
- Click Member Search to locate the Member. Clicking on the Member Search will bring up the same search as within Membership. See How to do a Quick Member Search (if needed).[ht_message mstyle=”info” title=”Member Search” show_icon=”” id=”” class=”” style=”” ]There is a slight variation within this search. You can pull up any Membership Record within the International when searching by a Member’s Full Government ID and Last Name. This is due to needing the ability to make a payment for any active member that walks into your office from another local (that isn’t depositing a clearance card first).[/ht_message]
- Or Add Non-Member if applicable.
- The Add Non-Member button will allow you to add a person to the Member Database with only a First and Last Name.
- We don’t recommend this unless you are trying to post a payment from an Employer.
- If you have to add a Non-Member, please do your best to get a Government ID before creating the Non-Member Record. This will allow you to update the Non-Member Record to a Member instead of creating two separate records that will need to be merged at later date.
Viewing Member Dues Information
Current Member information will display after clicking the View from the Member Search. The first table is Member Balances (Current). It shows the unpaid balance from an up-to-date assessment. This is the Member Dues Summary.
The next table shows previous payments and payment dates. There are PDF and CSV file export options for this data.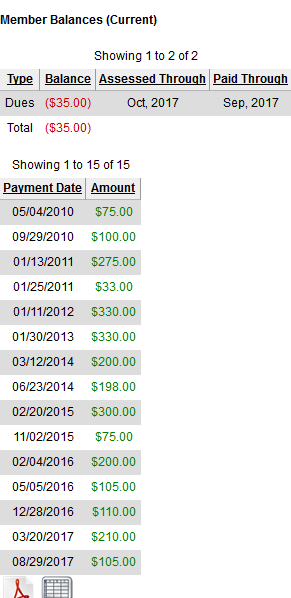
Posting Payments
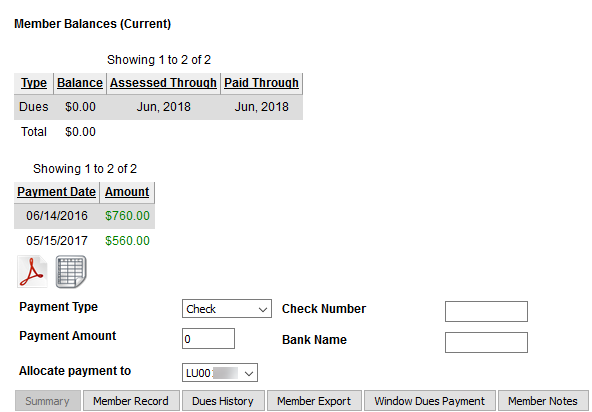
The boxes below the tables are for payment entries.
- Choose Payment type: Money Order; Card; Cash; Check. Enter check number and Bank Name (if applicable).
- If you select Card, for security purposes, Do Not enter the Credit Card information. You may enter the Receipt Number for the transaction and the Bank on the Card for the Name.
- If you select Cash payment, the Payment Number and Payment Name boxes disappear.
- Enter the Payment Amount.
- Select the Local that will receive the Payment.
- Click Window Dues Payment button to post the Payment.
Window Dues Payment button
- Click the Window Dues Payment button routes you to the Payment Allocation Screen.
- This allows posting of payments to more than one balance (Open or New Balances). For example, the member is paying $75. You may allocate a portion of the payment toward a prior balance such as a Death Fund.

- This allows posting of payments to more than one balance (Open or New Balances). For example, the member is paying $75. You may allocate a portion of the payment toward a prior balance such as a Death Fund.
- Click the Add Additional Charge button to apply money to other fees as well.
- For example, a portion of the member payment fees could be for a T-Shirt or Hat. These types of fees would not be applied to a group membership.
- Once the Allocation is ready, click Save to Preview the Payment.
- You can add Notes to the Receipt at this time. Notes will appear only on the Dues Receipt, not in the member’s record.
- Click Save again to Submit or Cancel to make corrections/changes.
This will create a Member’s Dues Receipt. See Understanding the Member Dues Receipt & How to Apply a Check-Off Payment if needed.
Payment Allocation to a different Local
If a member payment should be applied to a different local use the existing Member record. Select the other Local from the drop down menu. If the local is not available, contact IMS Support for assistance.
Other Member window Views
There are several other buttons along with the Window Dues Payment button at the bottom of the page. They are quick links that route to different sections of the Member record.
- Member Record: shows you the Member Summary (from Membership).
- Dues History: show you the Member Dues History.
- Member Statement: allows you to generate a Member Statement.
- Member Notes: allows you to review and update Member Notes.
- Check Off Payment: See ‘How to post a Check-Off Payment’