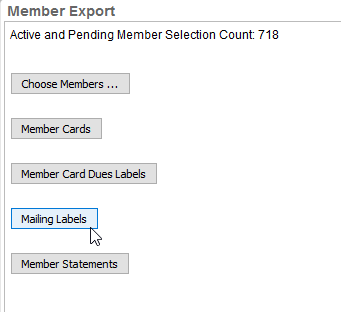
Member Search
- Complete a Member Search. See How to do a Member Search if needed.
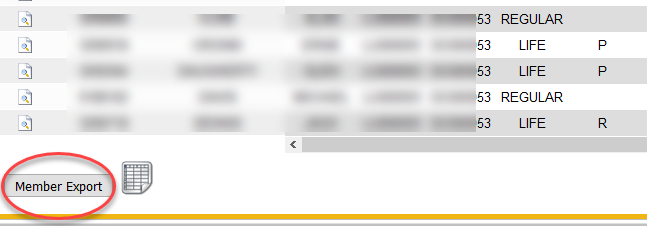
- Click the Member Export button to get the Member Cards.
- The Member Export button appears below the Search Results boxed area.
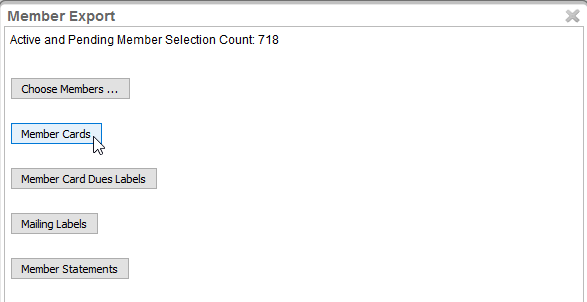
- A smaller window will open after clicking the Member Export button. There are five options: Choose Members, Member Cards, Member Card Dues Labels, Member Statements.
Exporting Membership Cards
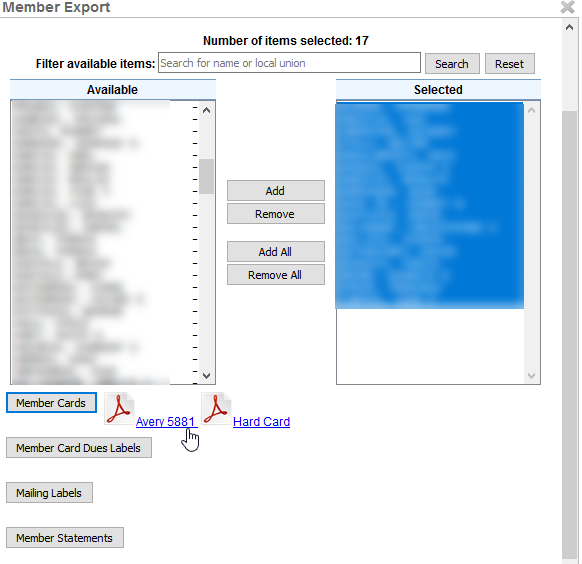
- Click the Member Cards button
- Two PDF icons will appear to the right of the Member Cards button.
- Avery 5881 – 8/Page – Cardstock – This Cardstock IS provided by the IUPAT. Please contact IMSsupport@iupat.org to order for your Local
- Hard Card – Plastic Card Printing – This was requested by several of our Councils, so we have made it available. However, we do not supply any printing supplies for these Plastic Cards.
- Two PDF icons will appear to the right of the Member Cards button.
Exporting Mailing Card Dues Labels
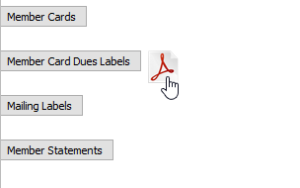
- Click Member Card Dues Labels
- A PDF icon will appear to the right of the Member Card Dues Labels button
- Click the PDF icon
- Allow the file to open in PDF form. Do not Save because of frequent changes.
- The PDF will produce individual Member Card Dues Labels for printing.
- Go to this article for more information on how to print dues labels
Exporting Mailing Labels
- Click the Mailing Labels button.
- Click Create Mailing Export
- Details for Mail Exclusions will appear below.
- Mail Exclusions tells you how many overall members were found (which is the same as your previous member search).
- **It is strongly recommended to check the Exclude Invalid Mail Address.** This reduces returned mail for incorrect addresses.
- How many mailing labels will be created (Included Members).
- How many labels will not be created (excluded members).
- If you would like a list of those excluded members, open up the “Exclusions” CSV File. This file is the same format as the Membership CSV from the Membership Search Window.
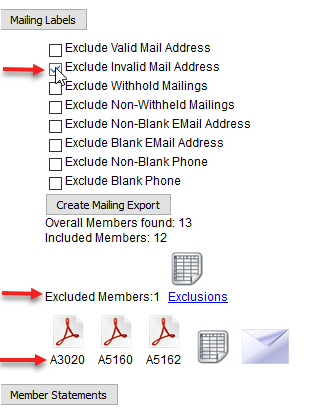
- Mail Exclusions tells you how many overall members were found (which is the same as your previous member search).
- Details for Mail Exclusions will appear below.
- Below the Exclusions list are few icons near the bottom of the page. These are the available Export type options.
- PDFs:
- A3020 – Dot Matrix Printer @ IU Office – Not usable by DC/LU’s
- A5160 – Avery 5160, 30/Page Labels – Most Common – DC/LU’s need to provide their own Labels
- A5162 – Avery 5162, 20/Page Labels – Larger Shipping Size Labels
- Excel File – This is the same as the member search CSV only filtered down based on Mail Exclusions
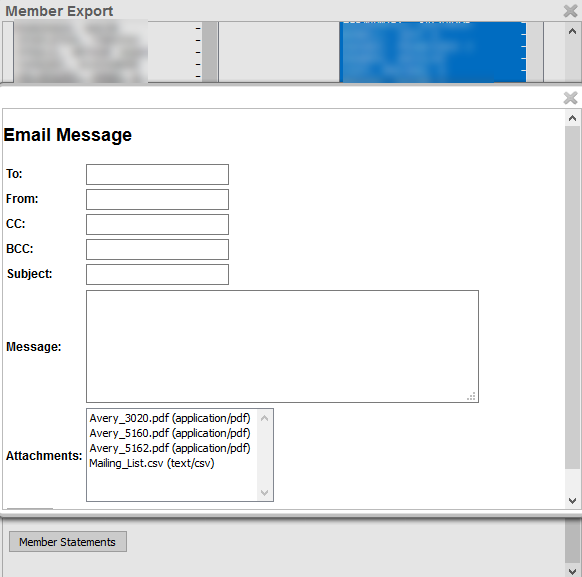
- Envelope – This will allow you to email any of the documents to someone right out of IMSe.
- PDFs:
- Click the icon of the preferred file type (PDF, CSV, or Email).
- Another Window opens if PDF is selected.
- When using a PDF file, be sure to choose to Open with.
- Please do not save these files types due to frequent Member Address changes in IMSe. If you want to print the Labels at a later date, re-download the labels at that time.
Printing the PDF
- Click OK to view in PDF.
- It is very important to review the print settings before sending the document to your printer. If your settings are not correct, the addresses may not end up on the labels.
- When Printing the PDF: Change the Page Scaling to None & uncheck the box for Auto-Rotate and Center.
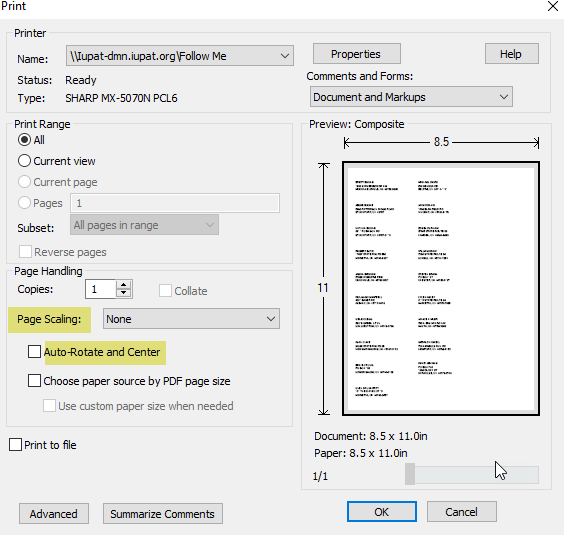
- Click OK after changing the print settings. Then Print.
Other Export Options
- The other export options are Excel and Email.
- The spreadsheet icon allows you to view the member information in a CSV file. This makes viewing all the selected members easier being all on one page. However, it is not the proper format needed for prints.
- The envelope icon opens a pop-up window that allows you to send an email with the mailing labels attached as PDF and CSV files. The files are automatically attached to the email for you. All 3 PDF file types are attached.
Member Export for a Specific Group – Choose Member button
If you need to Export a Member Card, Dues Labels, or Mailing Labels for a limited number of members or a specific group, you may use the Choose Member button to narrow your search.
- Click Choose Members.
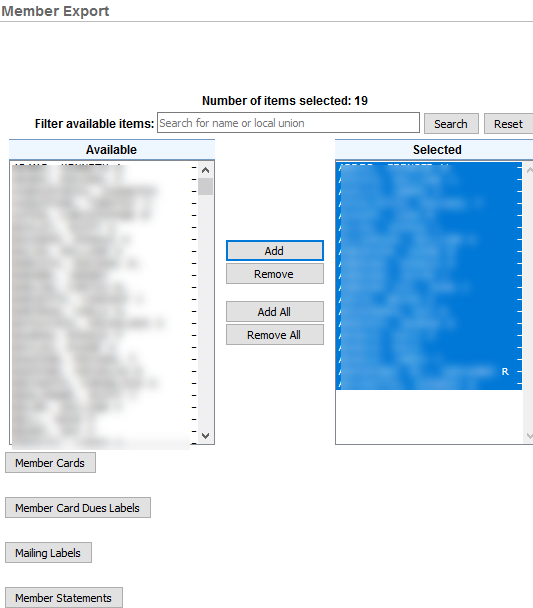
- The next window shows the list of Available member names (based on the Member Search) in a box on the left.
- The left box is the Available Member list to add to a selected list to export. There is an empty box on the right. The right box is the Selected list.
- Move members from the left to right by clicking the Add button in the middle.
- You may select multiple names by holding the Ctrl button on your keyboard and clicking the names with your mouse. The names will become highlighted.
- The Filter available items box allows you to search by name or local union.
- Click Search after entering a name or local union.
- The Reset, only resets the filter (what’s entered in the box). It does not reset the Selected box (names already in the Selected box).
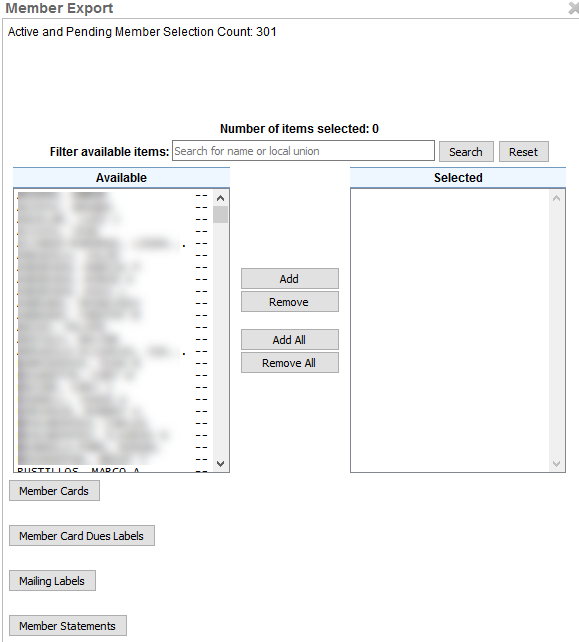
- Click the Add button to move the names to the right (Selected) box.
- The Add All button moves all the names from Available column to Selected column.
- The Remove and Remove All buttons shifts the Member names from the right box (Selected) back to the left box (Available).
- The Add All button moves all the names from Available column to Selected column.
- The next window shows the list of Available member names (based on the Member Search) in a box on the left.